We've got some blessed rains falling today, so the painting is delayed. I wanted, however, to post the pix of the (almost) finished coop. As soon as it's painted I'll update things. Here's the chicken door and gang plank. To the left you can see the flap door for the nest area. You can also see the recycled windows I put above it. These are crank-out windows I got somewhere. As I stated before, all the materials for this project were recycled, except for the treated 4x4's you can see as runners and main verticals. I also purchased fasteners, hinges, and hasps, although I did at the last minute find some used door hinges to use for part of it. One pair is on the nest flap.

Here's the opposite end showing the back and "people" door for cleaning etc. The recycled nature of material is obvious here in the mismatched paneling. Paint will change that. Some wire net is still to be added to the vent flap opening shown, however, it will be closed at night for quite awhile, as well as the front windows, so that can be put off a bit.
Here's a shot of the interior through the large door. The roosts are visible. The floor is covered with wood mulch here. The light fixture was a recent find at Goodwill. A feed trough is in the center. I'll replace it soon with a self-feeder.
A shot of the nest box with the first egg! I moved the hens to the new coop after dark last night. Looks like they got the idea!
On the left is my first constructed bee hive. Cat Dancing painted it with some help from Michael, now the ladies have moved in and made themselves at home. We got the bees a short time ago, after they weathered a fiercely hot summer. We already have plans to build more hives to sell, as well as working on a hive cooperative plan for area growers. I'll post more as it develops.
Previously I posted about our new chickens. They are all doing well, and the "rescues" I added to the flock have come along nicely as well. We've got daily eggs for breakfast and baking.
This is the temporary coop that came with the chickens. It's barely adequate for the number of hens we have, plus, it is a bit reminiscent of the legendary "two story outhouse". Particularly for the hens on the bottom roost! Therefore, my current project is to build a new hen house!
For awhile I've been admiring pictures of what is called an "Amish" style hen house. It's a very compact and sensible design. I worked up my own plans for one and got to work.
The main frame verticals are tied directly to the skids. I used treated 4x4 lumber, notched and bolted at the base. So far this is the only purchased lumber to go into this project. Two skids are required.
The artisan at work. Ahem!
 Once the skids are done, the framing begins. Here the floor platform and the back wall is started. The footprint is essentially 5'x6'. The rest of the building is made from scavenged material.
We had a nice piece of 3/4 plywood from an old bed frame we rescued from someone's trash. It was almost large enough for the floor. I added a pair of scavenged 1x12s to finish the floor out.
Here the wall framing is nearly done. It is ready for the roof joists. It is taking shape. You can perhaps make out the large doorway in the near end, and the chicken door at the far end. Also, the nest box area is visible. The sloping part on the right side will be the hinged lid to the nest boxes.
More to come!
We've had some really nice weather for working on my office trailer project. We definitely need rain badly, but it would not necessarily be a good thing while the wall of the trailer is wide open. However, I could put up with some.
Anyway, I've been moving right along.
Shown is the front end of the trailer. (Front being where the hitch is.) This end will most likely wind up being more for storage eventually. It may look as messy as before, but actually it has been cleaned up. What you're seeing is my scavenged building material ready to use in re-building. The end window was really not fixable. I have to totally re-frame the area around one window on the wall to our right, so I re-located that good window to the end. The (also scavenged) extra windows I have are of a different size. Since I'm re-framing anyway, I will frame it to accept the different size window. I'll have to finagle the exterior skin some, but that will be minor.

Another exterior shot of demolition. Rotted wood and bad paneling are piled on the ground outside. Here you can see where the door was removed.
I replaced the outside floor joist 2x6 along with some judicious splicing. Here it is already attached.
An outside shot of the new floor joist 2x6. This acts as floor frame and also supports the wall. There are metal braces below that attach it to the steel trailer frame.
Here is some of the new floor framing. 2x4 cross pieces were cut and inserted at about two foot spacing. The old flooring was cut even with the next existing 2x6 floor joist. A new 2x4 was added as a cleat against the existing joist to give something to attach the new strip of plywood to. In the upper right corner you can see one of the new floor pieces. I suspect you give up a bit of strength doing this. The floor was originally one sheet of plywood continuous across the width. That continuous piece gives it a membrane effect. To replace the whole floor would involve rebuilding the entire trailer from ground up. I don't have time, energy, or money for that. This will have to do.

New wall framing in place. To be consistent with the existing style of framing, a 1x2 runner was added along the top of the floor edge and new 2x2 verticals added to duplicate the original locations. One vertical stud had to be slightly relocated to accept the replacement window that, again, is of a different size.
Verticals are notched on the outside to accept the horizontal 1x3's as well as the existing wiring. The skin will attach to the horizontals, while the inside paneling attaches to the vertical studs.
All the new framing for this wall is done. We're ready to screw the skin back on, insert the window, do insulation and inside paneling.
I'm not sure how feasible this project would be without having all the scavenged lumber available. So far we've only been out the moving fee for the trailer. All the lumber has come from scrap piles at other vendor's booths out at the Sherwood Forest site. The windows, paneling, and other material came inside this free trailer or the portable office building we were given that we now use as woodworking shop. (See previous post.)
More to follow soon!
Okay, we have a hiatus of sorts. Sherwood Forest Faire has ended for this year. We won't be able to continue work on our booth for perhaps a month. The powers that be at Sherwood must spend some time doing their own thing before they let us back in to work on our thing. We're hoping they let us in at least to water our flowers.
So, I'm back on the hunt for employment and in the meantime helping Cat with her art (and my own). Also, since we have good weather and cool mornings, I'm jumping into the renovating of my office trailer.
To re-iterate what I've posted before, when we started building our booth out at Sherwood, there was an old portable office and an even older office trailer out there. One of the owners let me have them both on the condition I would haul off all the stuff that was in them as well. That was actually a good deal, as there was a lot of good building material and other useful stuff stored there. Some of the material has actually been used in our booth, and the portable building has already been converted into a workshop for Cat and I. Previously she'd had a tarp covered portable carport to work under in the back yard, now we have a reasonably weather tight building with room for Cat's intarsia space in one end, stained glass work space in the other, and my own workbench for flutes etc. along one wall.
Notice I didn't say "ample" space, but it is very good for now, and most of the time we can expand out under the trees to do some things if we need to. The landlord was kind enough to allow us space to put it all, on the condition everything goes with us when we move.
It took a bit longer to move the office trailer, almost a year, in fact. A lot of the material from the portable we shifted to the trailer so we could move the portable, and it stayed there. It was relatively dry and secure and out of the way. As I said, some of it was used on the booth anyway, so it was close to where it ended up. We finally cleared the trailer mostly out and I contacted a mover.
It was a bit of a challenge. I had to locate four mobile home tires for it, since the old ones had rotted. The basic metal frame on the trailer was in good shape. Some of the wooden wall framing, however was not. I would estimate a third of the wood framing is rotted out. The floor is mostly good except a few places near the walls. One rear corner has to be re-framed, some work needs to be done on a front corner, and the lower part of one side wall and the attached floor near the door must be replaced. Fortunately all the metal skin is intact, if loose in places, and the windows are mostly good with only a few broken panes.
For moving we wrapped the walls with towing straps and come-alongs to keep it all together. It was a sixteen mile move to our place and we did have to stop and re-adjust things once. A couple of times we wondered if we were going to make it, I admit, but we did. In the following weeks I leveled it and blocked it up.
Now the work starts in earnest.
Here's the beast as it sits. Obviously before I finish it will need some paint as well.
Loose sheet metal near the door. You can see part of the "Highland Mall" printed on the side. This trailer once was a movable showroom for Lowrey Organs. I actually remember seeing it parked outside one of the malls.
The back corner that is rotted. The wood framing will get replaced. As you can see, the metal is intact. If I'm careful it should not be too hard to re-attach after the framing is done.
An inside shot of the corner to re-frame. And, some of the stuff that still needs to be cleared away.
Inside the side wall that needs work.
A plus. Since it was a showroom for electric organs, I have plenty of fluorescent fixtures and wall plugs with a really good breaker box.
Another plus. A working 110 volt window unit a/c. Huzzah!
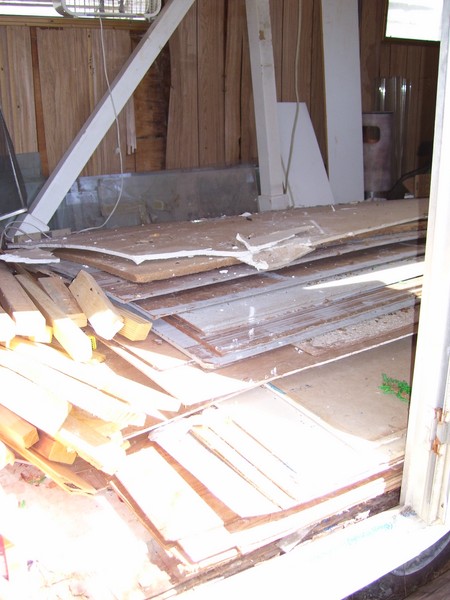
And still another plus. It looks like a mess, and I did have to clear it out, BUT, what you're looking at is more than enough sound lumber and paneling to make the repairs I need to make. I may only have to buy nails and screws. I have my fingers crossed on that score.
I really didn't need extra windows, but I got a bunch. Some of the glass, though can be used to re-glaze the existing windows. Somebody want to build a greenhouse? Besides the aluminum windows there are loose panes of glass galore.
A shot toward the front of the trailer. More stuff. There are actually two small white chest of drawers there with drawers full of acorn shells some critter was filing away. There is also an old wooden desk standing on end that I'm hoping to re-claim for my computer desk.
Well, that's the project. I'm hoping to have enough space I'll be able to retrieve everything from my storage unit and store or use here, plus enough space for bookshelves and computer desk for writing, drafting, and a bit of solitude. Hmm, maybe that's what this will be, my "Fortress of Solitude". Hey, Doc Savage and Superman had theirs, why not me?
We're sometimes a bit cramped in our house, so this will be my space. Actually, a large part of my storage unit is taken up with books, so if I can get my books up on shelves, that will be a large help. I'll keep you posted on my progress. Stay tuned!
Several folks are following the growth of our Sherwood Forest Faire booth. This last weekend was the 2011 opening for the Faire. Here is where we are:
As we were getting near the end of our light straw and clay wall construction we ran up against a county-wide, darn near state-wide, fire ban. Daily temps were getting colder and it had become necessary to heat our water over a fire to mix the clay. Each morning we found the soaked clay from the day before resting at a temp near 40 degrees F or colder. This was nearly impossible to mix, the best temp for mixing the clay and straw is at least 60 degrees F. A couple of buckets each of near boiling water added to each barrel of mud pretty much did the trick. However, no fire, no hot water and no mixing. Fortunately, most of our walls were high enough for Faire purposes, namely giving wind shelter, a place to display art, and concealing the back stage area. It was only necessary to add some of the form wood to one bay of the back wall for concealment purposes.

The back door was constructed and mounted, along with the front window shutters and doors. The hinges were made by Earthen Metals, one of the local blacksmiths for the Faire.
So, here is how the booth looked for opening day, 2011. Hark, yon patrons approach!
To be greeted by Milady Cat Dancing, Artist in Residence! We needed store counter space, and we needed to store our remaining straw bales out of the weather. Solution! We made the counter out of the straw bales, topped by wood and draped with cloth.
Intarsia and stained glass boxes against the back wall of the booth.
Intarsia on the south end wall. Notice the RainCrow-designed/built light fixture above the art.
Display of RainCrow made Sylph-Song Flutes against the back wall. Some have dragons. A mix of pentatonic and Spanish Gypsy tunings.
Wall hanging and intarsia inside the front wall. Along with Sir Silas of Bryan.
Our booth was fortunate to obtain a Charter Vendor banner. Last year, the Faire's first year, we vended off our porch as shown in my previous posts. All in all we received almost as many questions and compliments on our booth construction as for our wonderful art!
Looking out at the Faire through a front window. The wind chimes are new this year. We are carrying them for friend Lynn Kirby at Splendor in the Glass.
A look from outside the same window. Stained glass, wind chimes, our custom logo, and a bench by local artisan Black Wolf are visible. You can just see the window shutters and the extents of the clay above the porch roof.
Opposite end of porch with remaining stained glass , shutters, and top portion of waterfall shown.
Waterfall and flower garden. The primroses are gorgeous!
Gina and her pet rooster Friar Tuck are loved by the children at the Faire. She commissioned a pet portrait from Cat Dancing last year. She was ecstatic at the result! See for yourself!
Sir Silas is modeling his new Captain's Coat from Two Spools at the Faire. Wake and Stacy do wonderful work!
Sir William of RainCrow must needs have new attire of his own. A new custom-made cloak from Two Spools fits the bill, or the Bill.
Of course, Sir Michael got his own cloak as well. Two Spools once again provided. Michael is taking the afternoon off from working at the King's Swing attraction at the Faire.
It was a beautiful opening weekend for Sherwood Forest Faire. We have lots of weekends to go yet. Come see us! I'll also be posting more pics from the Faire soon!


